
Working with large files all the time can be a big problem, especially in the long run. Whereas on desktop you can have terabytes of space and you can always buy a new storage. The online world limits you a lot in terms of cloud storage, even more, if you want to send your data over the internet.
This is why you should always keep your final output as small as possible. Nonetheless, video and image file compression brings a new problem, the quality loss problem. You do not want to send low-quality videos and images to your co-workers or, worse, to clients. So, what can be done?
Fortunately, there are compression apps that can help you to reduce the size of your graphic files. However, do not expect miracles because high resolutions videos and images always take storage.
Table of Contents:
- 1. Basics of Data Compression
- 2. Video
- 3. Image

Basics of Data Compression
First of all, keep your projects’ source data because you never know if anything will have to change in the future. So, store properly all the .ai, .psd, .veg, .prproj for Illustrator, Photoshop, Sony Vegas, Premiere Pro, etc.
In a nutshell, data compression takes the original file and cuts all the redundant data. For example, if you have an image of a tree, compression will shrink similar color values to itself, creating more superficial information, which means smaller files. Compression is divided into two main categories.
Lossy compression
Both compressions can be derived from the title. Lossy compression will irreversibly cut out some of the data files. However, it is much more effective than lossless compression. Lossy compression is mainly used for video and sound compression because human beings can not notice the insignificant quality loss in these two.
Lossless compression
This compression is brought to us by intelligent algorithms that permit accurate reconstruction of compressed data. It only rearranges data to the space-effective form. Lossless compression is primarily used by text files, where a loss of a single character can destroy the whole meaning. Image formats like PNG or GIF also use it.

Format
Your video and image file format is related to compression, just as tin is related to bronze. The format has to be appropriately chosen because it is the first compression you do. The most famous image formats are JPG, TIFF, PNG, and GIF. First, two have lossy compression. Nonetheless, JPG saves a lot of space. PNG, GIF is lossless and are used mainly on websites.
As I said above, video formats use mostly lossy compression. The most famous ones are AVI, MPEG, WebM, and MP4, of which only the MP4 is a fully lossless format that keeps all the data. However, the WebM is undoubtedly the winner when it comes to balancing between video size and quality.
Zip
Not an app. However, a file format that can make your videos and images smaller for sending and storing across all platforms and devices. Zip is a great universal tool that can merge videos, text files, photos, and other data into one space-saving file.
Subsequently, you can unzip these files, thus inflating them to their original size, and work with them as nothing happened.

Video
Now we know the basics about lossy and lossless compression and how formats influence videos’ size and quality. So, we can finally jump into today’s main topic of how to make smaller video files without losing quality.
Here are the best video compression apps:
Desktop
Mobile Apps
Web-Based
Desktop
Video compression apps on desktop computers and laptops are top-notch. They can be harder to use from the beginning. Nonetheless, desktop compression tools provide many tools to improve your videos.
Most simplistic and effective tool when it comes to compressing videos on desktop computers and laptops. HandBrake is an entirely free app with premium features and fast video compression.

After HandBrake opens, you can drag and drop videos into the center or find them manually by clicking on “Folder” or “File.”

Now, wait until your video uploads.

This tab will then pop up, and you can choose everything important from format through dimensions to codec and framerate. After you have done everything necessary, you can click on “Browse” and save a changed copy of your video to the computer.
Available on: Windows, Linux, macOS, iOS
Price: Free
How to compress a movie file? The answer is in front of your eyes. Most of us use VLC for watching movies and TV series. Nonetheless, this program can also help you with video compression.

Go to the VLC menu, move the mouse on “Media,” and click on “Convert / Save.”
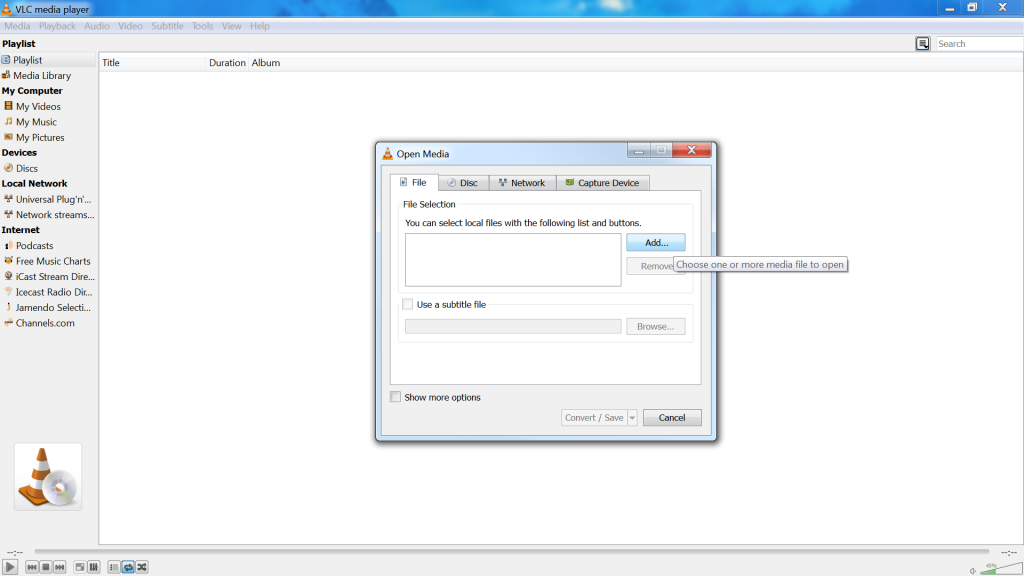
It will open a small tab where you can upload videos by pressing “Add.”
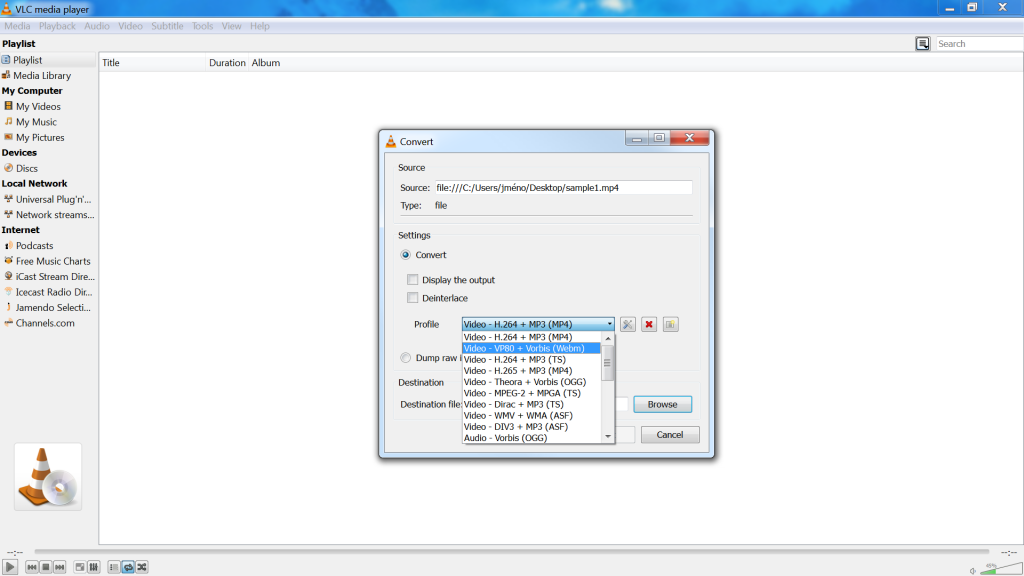
Convert tab appears and displays few compression options. If you want more, simply click on the tools icon next to the Profile tab.

In this profile edition tab, you can change anything from codecs to resolution. After you choose to save the changes in the profile edition and click on “Browse” to save your new video file.
Available on: Windows, Linux, MacOS, Unix, iOS, Android, Windows phone, Tizen
Price: Free
The premium video compressor app between our desktop tools. Adobe Media Encoder works best mainly in combination with other Adobe products like Premiere Pro or After Effects. It is important to mention that Media Encoder is not purchasable as a standalone program. However, If you own Adobe Suite or subscribe to Adobe Creative Cloud, this tool can serve you well even without Premiere Pro and After Effects.
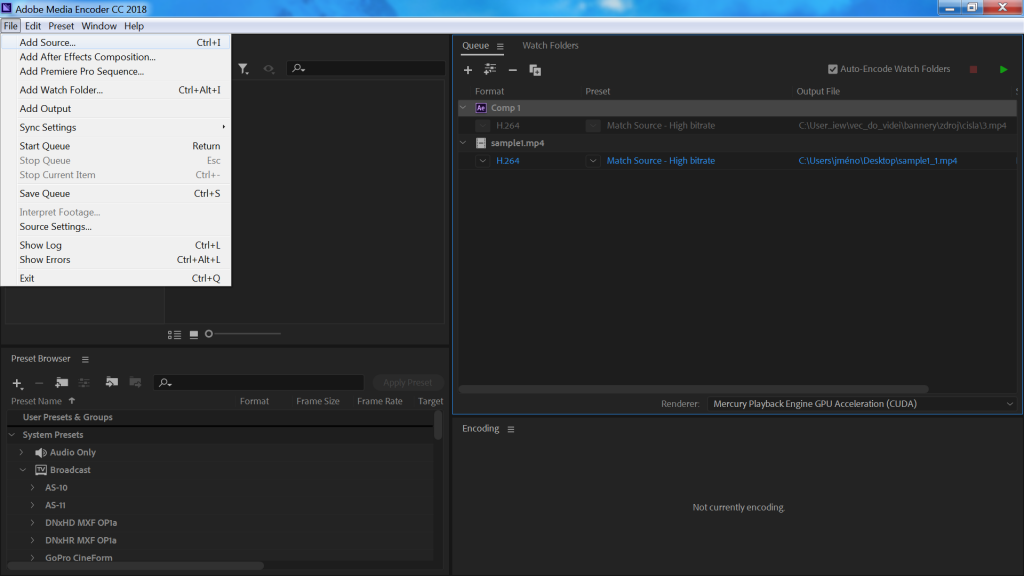
Open Adobe Media Encoder, then move the mouse on “File” and click on “Add Source” or press CTRL/CMD+i on your keyboard.
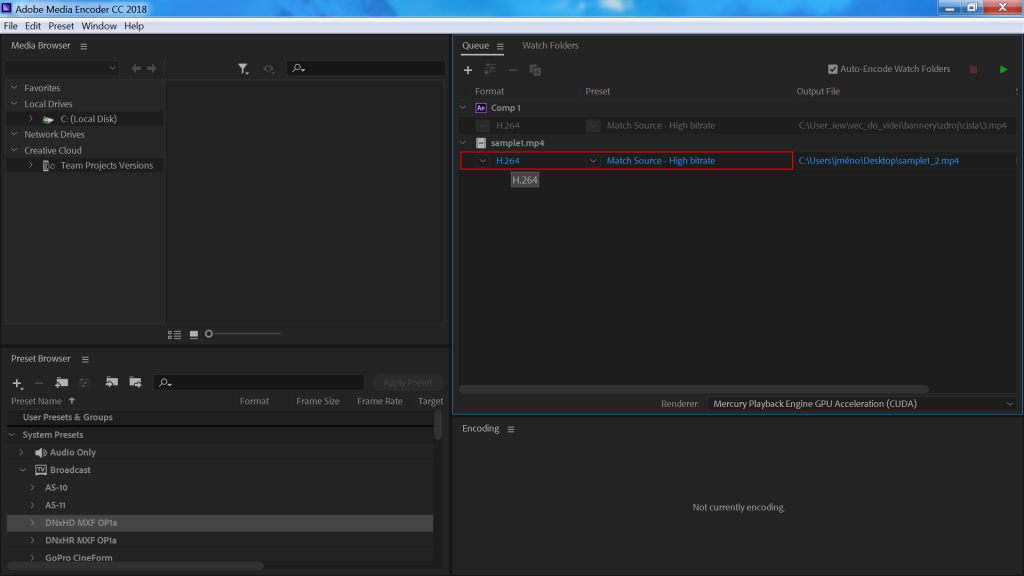
Choose the file on your computer, and the video will be automatically uploaded into the Adobe Media Encoder, then click on “Format” or “Preset.”
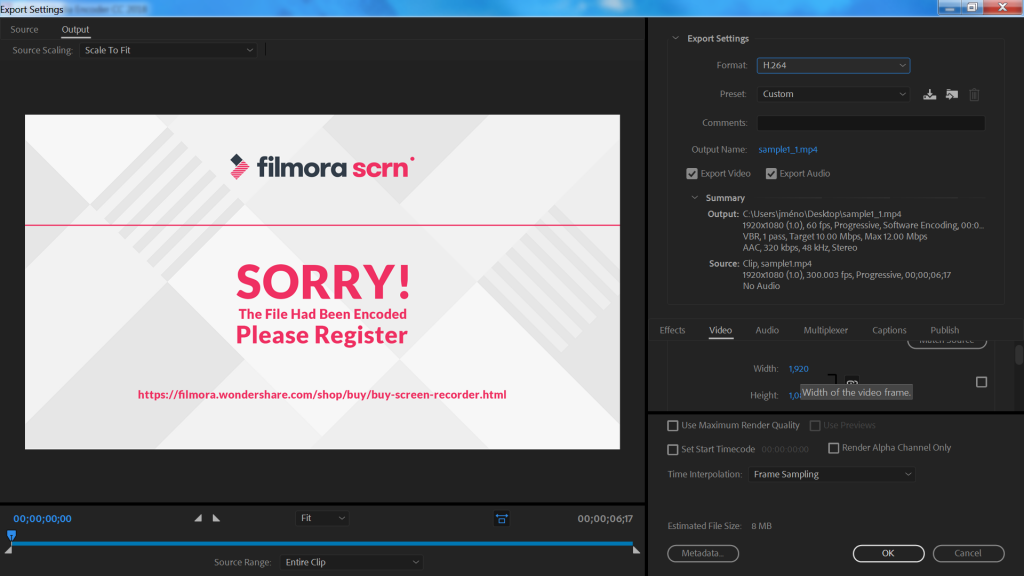
Export settings window appears. Because Adobe Media Encoder is a professional tool, you have many more options than in HandBrake or VLC. Besides the format, codec, and FPS, you can also profoundly influence audio, bitrate, or optimize video for VR.
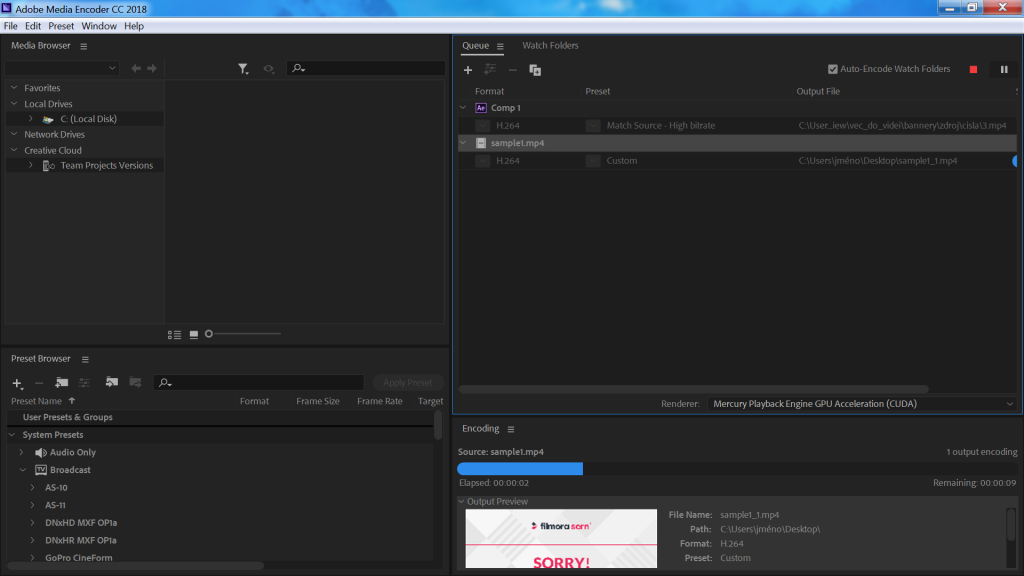
After you fit the video to your needs, press “OK” in export settings and click on the play button or press enter, Media Encoder automatically encodes the video into your chosen form.
Available on: Windows, MacOS
Price: Free in Creative Cloud bundle
Mobile Apps
Mobile video compression apps are much easier to use than their desktop relatives. Moreover, you can take them anywhere with you and compress data on the fly.
Panda Video is a perfect example of a comfortable usage app. This simple mobile tool will offer you just a few options for video compression. However, these options are sufficient for mobile video compression.
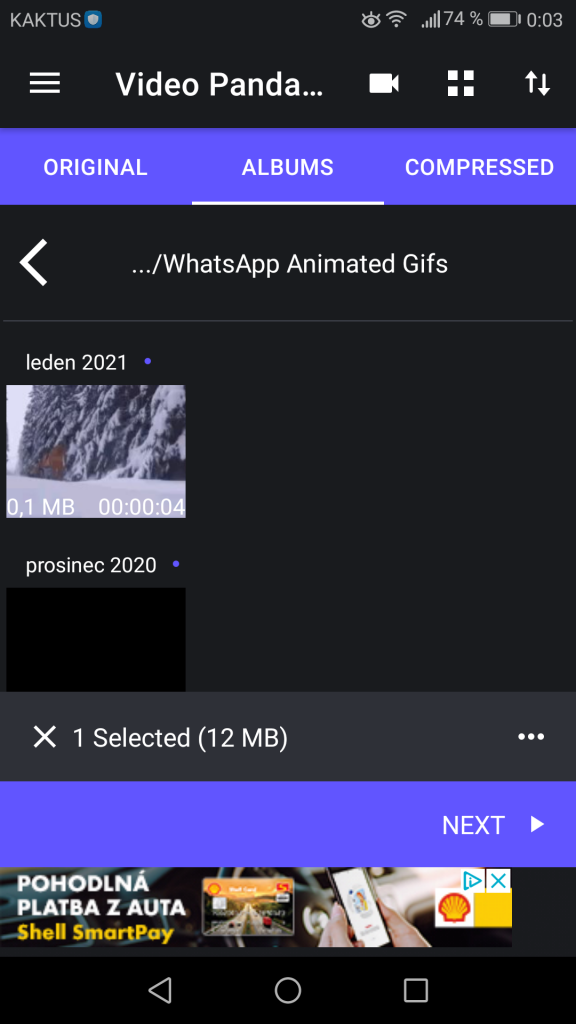
After you open Panda, you will see your mobile videos in three categories: “original,” which is an assortment of your videos, “Albums,” and “Compressed,” where are the videos you have already compressed.
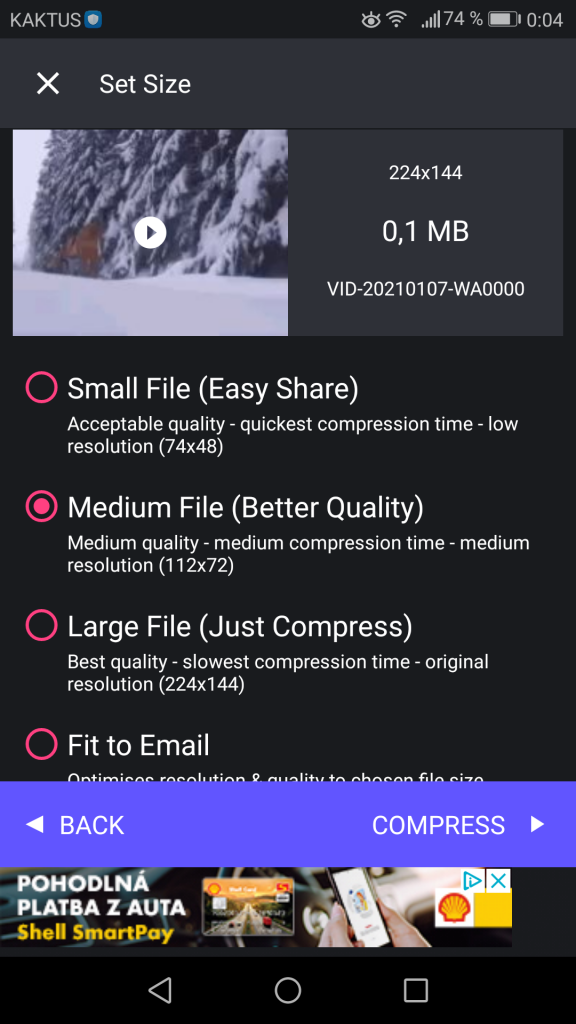
If you choose one of your videos, this screen pops up. Here even the video amateur can easily compress the video. Pick one of the options and press compress.
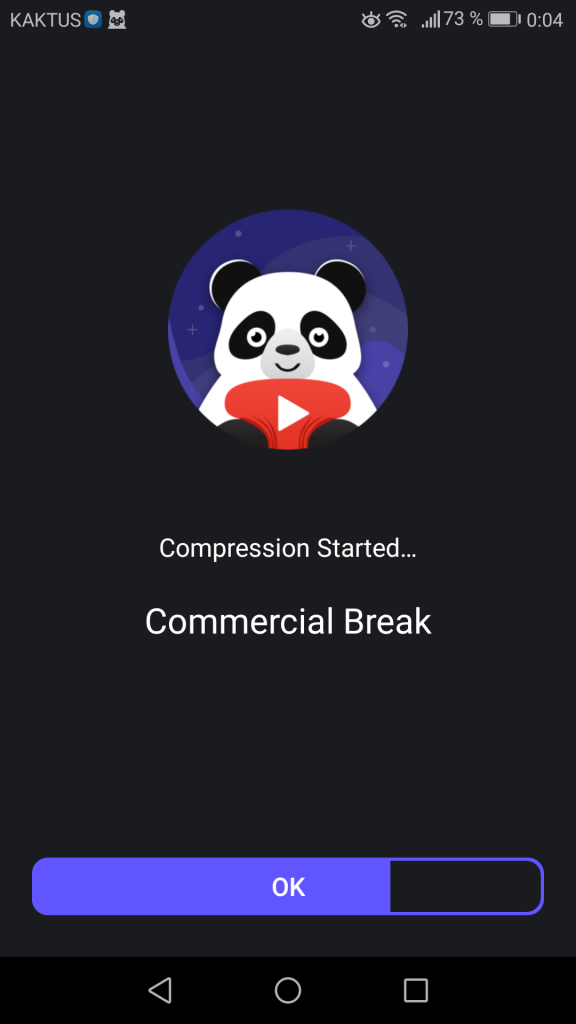
Panda will process the video compression.

And you are good to go. Do not forget to save the compressed video. You can also directly share it from Panda Video.
Available on: Android
Price: Free
MobileIdea Studio (Video Compressor)
Similar to Panda Video Video Compressor is easy to handle. Nonetheless, this video compressor app provides you with much more advanced features, such as cutting video or extracting MP3.
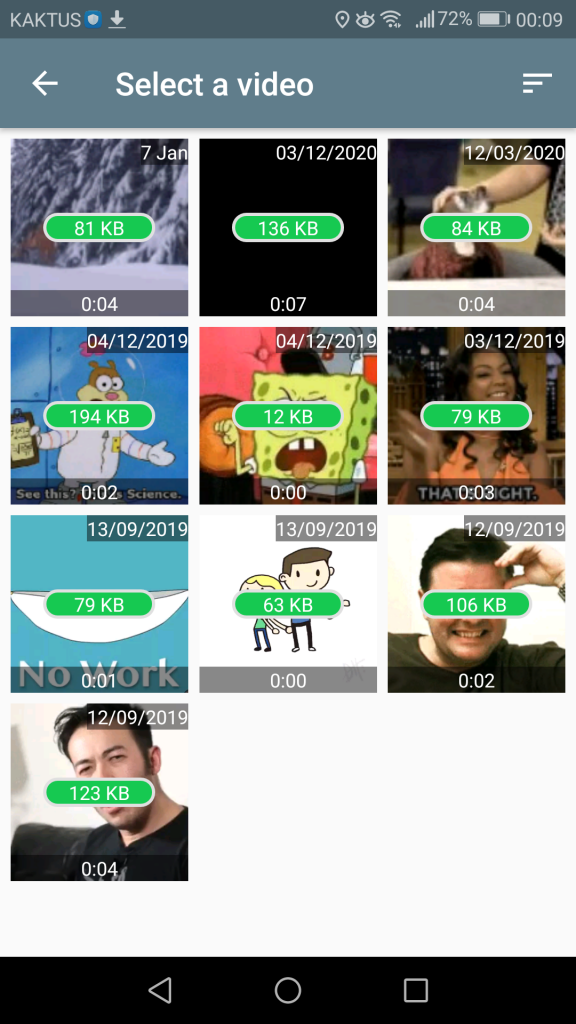
First, choose the video you want to compress in the video selection.
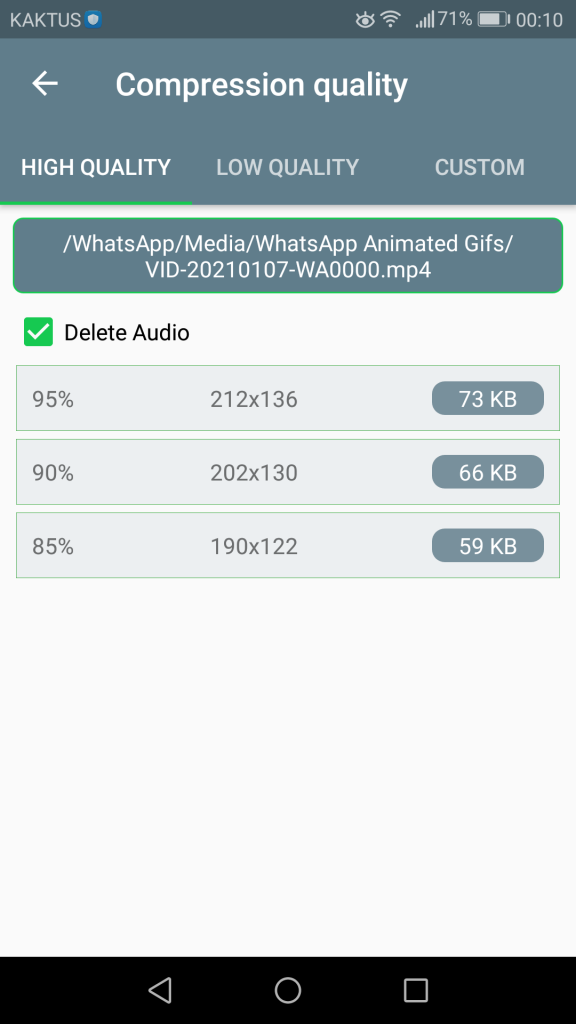
Then you have an option to choose two presets, “High Quality” and “Low Quality,” which saves space, or you can click custom and enter everything from the format to a codec manually.
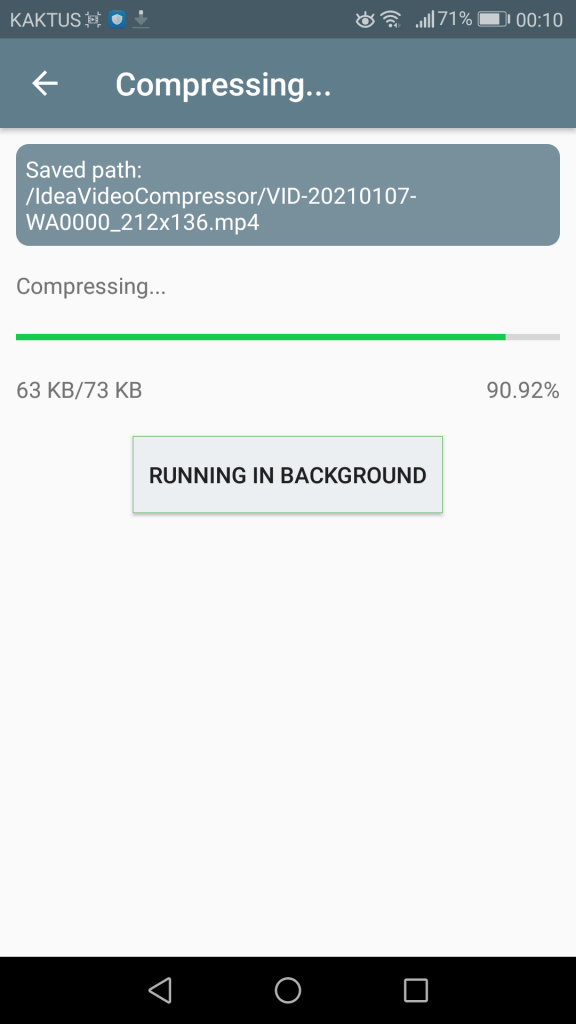
Video Compressor encodes all data pretty quickly. However, if you need to compress longer videos, you can run this program in the background and use your mobile for other activities.
Available on: Android
Price: Free
Dao Van Duy (Video Compress – Shrink Vids)
The last video compressor app is on iOS. At the core, this tool is very similar to Video Compressor. However, you have to buy a subscription to unlock features like video speed up, MP3 extracting and trimming.
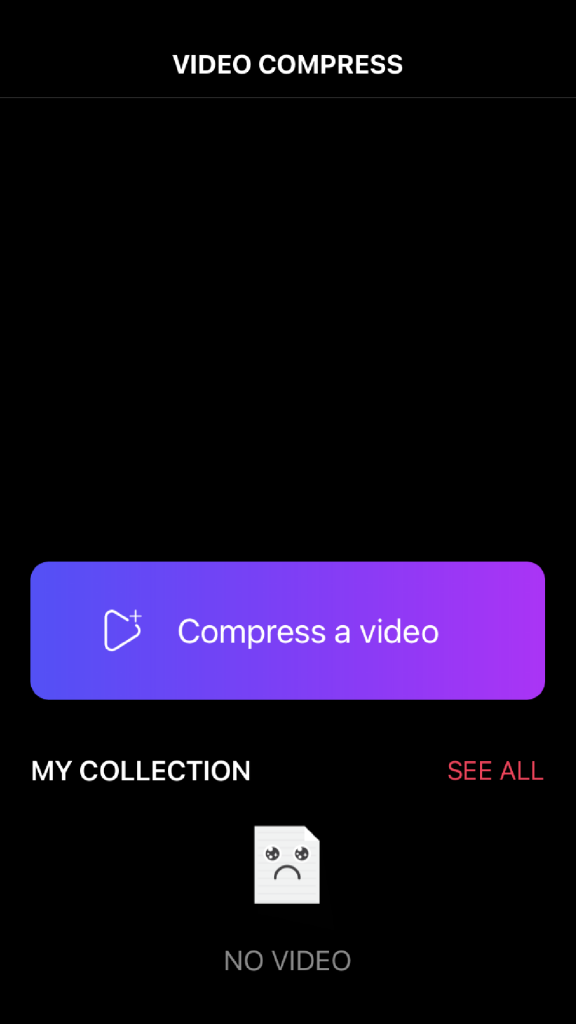
First of all, upload the video by clicking on the “Compress a video” button.
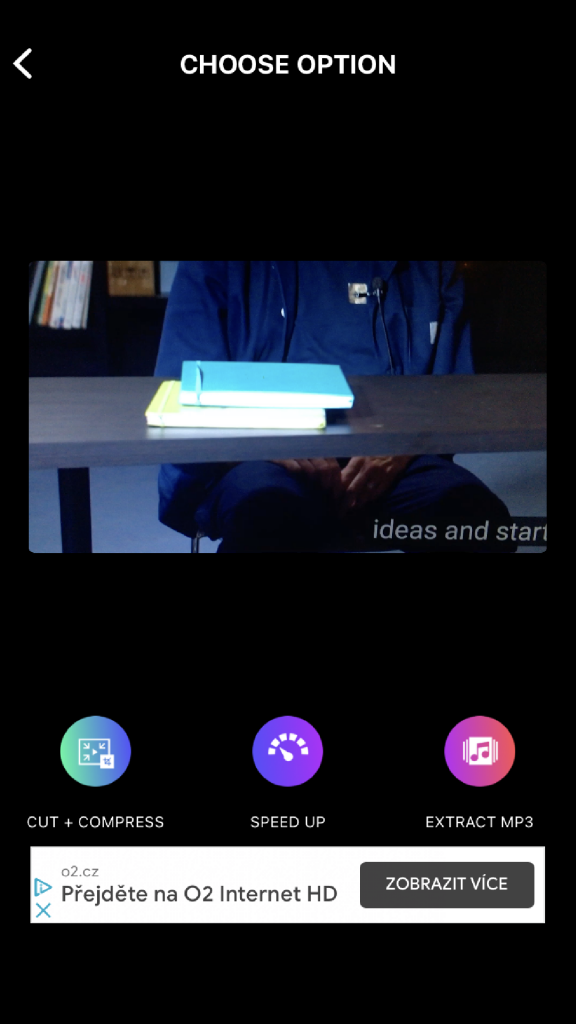
Then tap on “cut + compress,” and if you do not want to cut your video, press “next.”
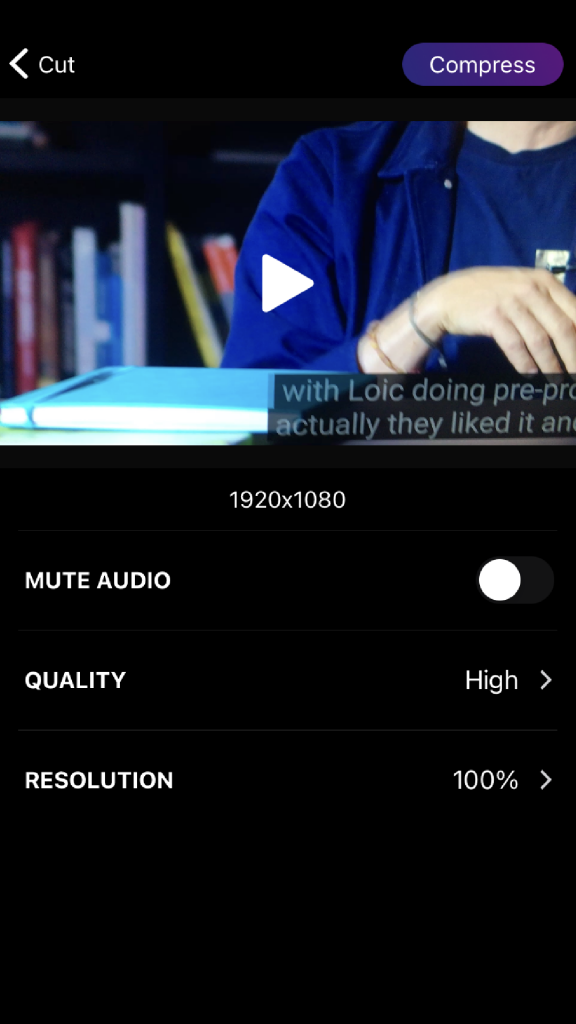
In this tab you can set video quality, resolution and mute audio.
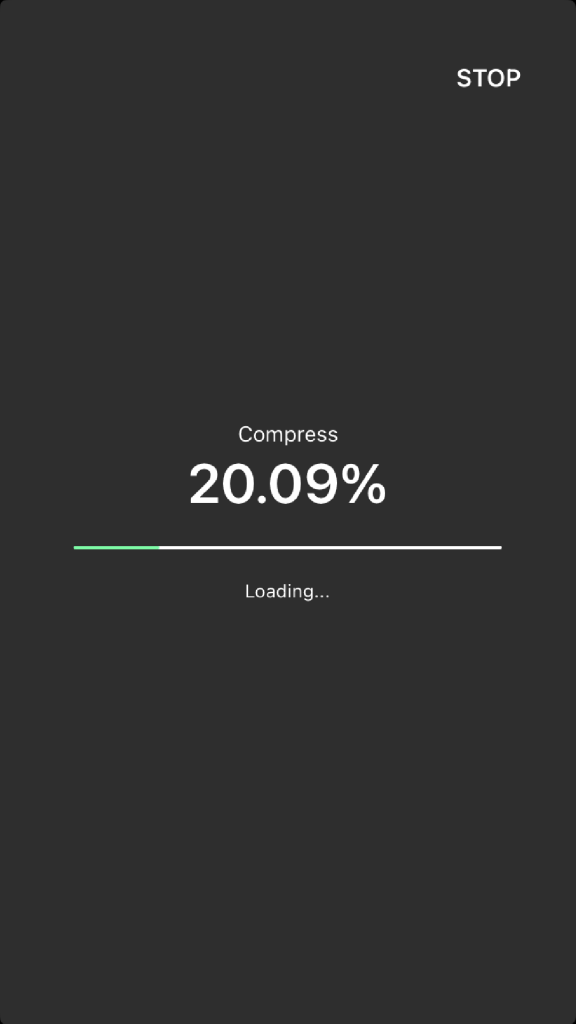
After you press “Compress” this encoding page appears; just wait until loading is finished and it is done. Now you can enjoy your compressed video.
Available on: iOS
Price: Free (Premium version: $15/month)
Web-Based
The third category of video compression apps are web-based platforms. These will provide you the simplest video compression available in every place with an internet connection. Plus, you do not have to download anything.
Web platform which will help you compress everything from PDF through Documents to, of course, Video. AConvert is a very easy to use website with only one purpose. Your files can be converted, cut, merged, rotated, cropped, or padded.
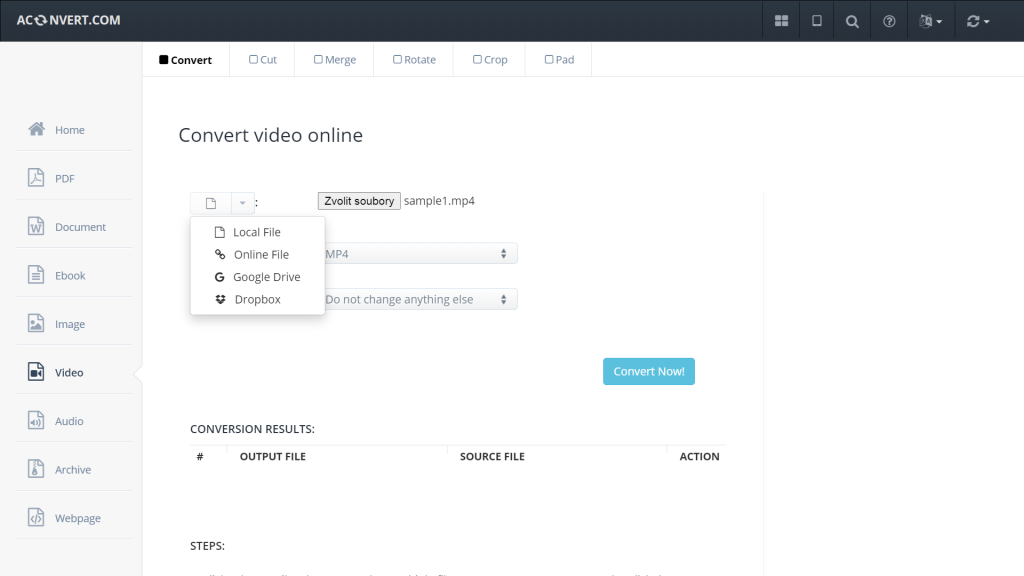
First of all, click “Video” in the left bar. Then upload your video file from local drive, google drive, online link, or Dropbox after the video loads, enter all-important changes like target format, video size, bitrate, frame rate, etc.
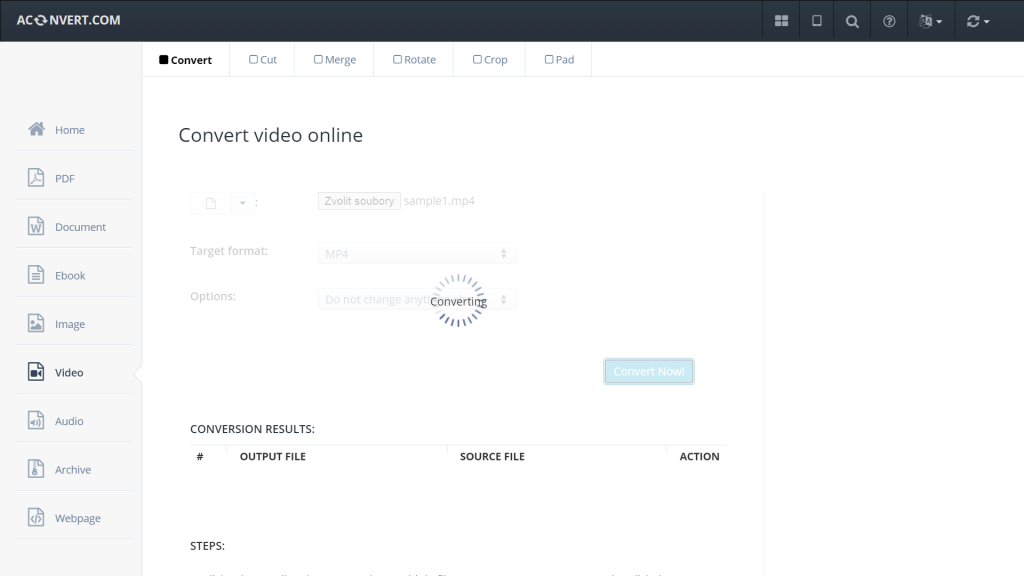
You can also do many additional actions like a cut or merge. These features are available in the top bar. After you did everything you wanted, simply click on “Convert Now” and wait.
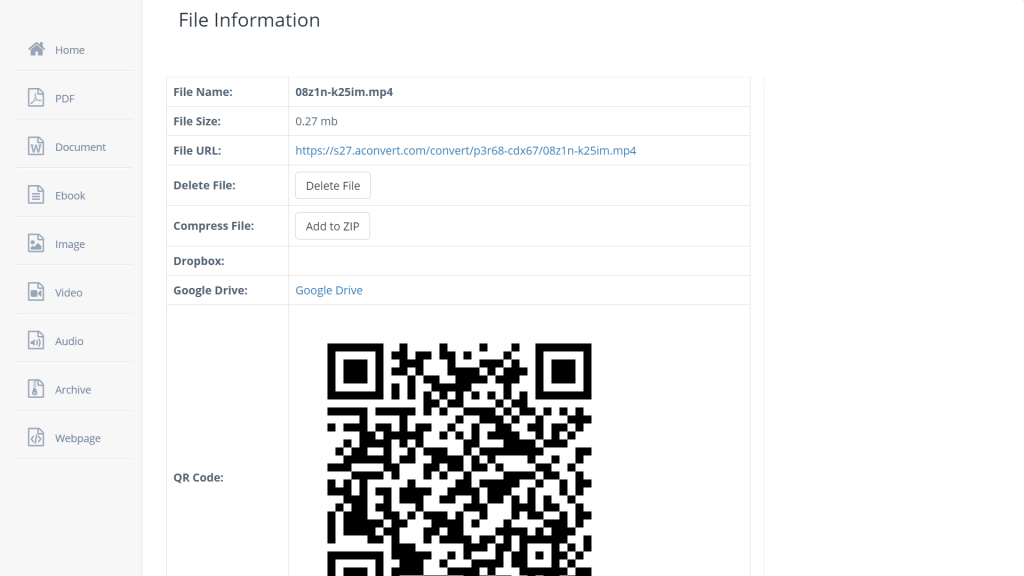
These columns appear, and now you can download the video directly from the URL, compress it into ZIP, scan the QR code for download, send it to your Dropbox or Google Drive.
Available on: All Devices With Internet Connection
Price: Free
The premium video compressor app between web-based platforms. Clipchamp in full version offering custom branding, cloud media backup, unlimited audio stock, and FullHD exports. The free version provides you only 480p exports. Nonetheless, the best things about Clipchamp are additional features like a webcam, or screen recorder, and advanced video editor.
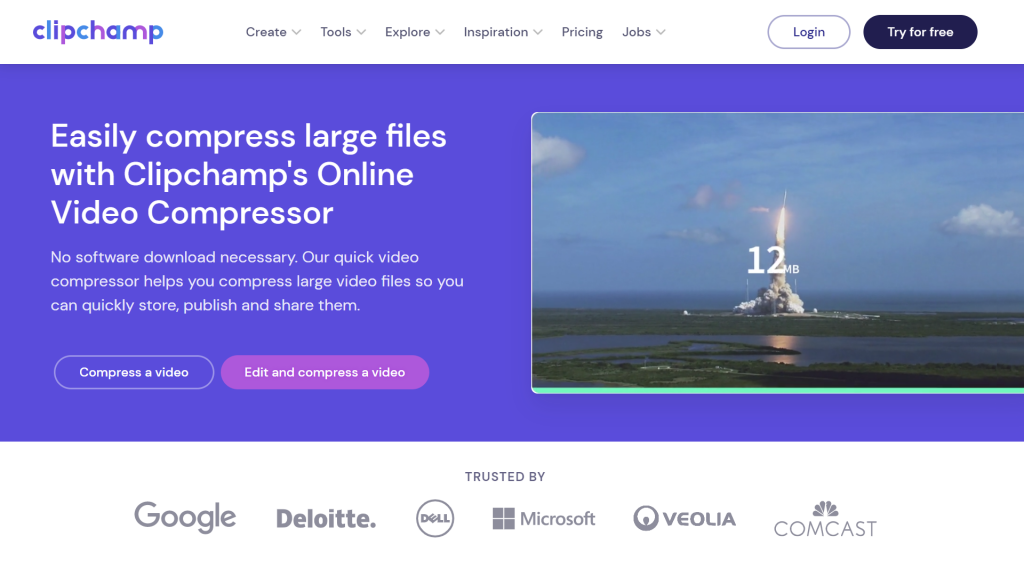
Choose if you want to edit and compress or just compress your video.
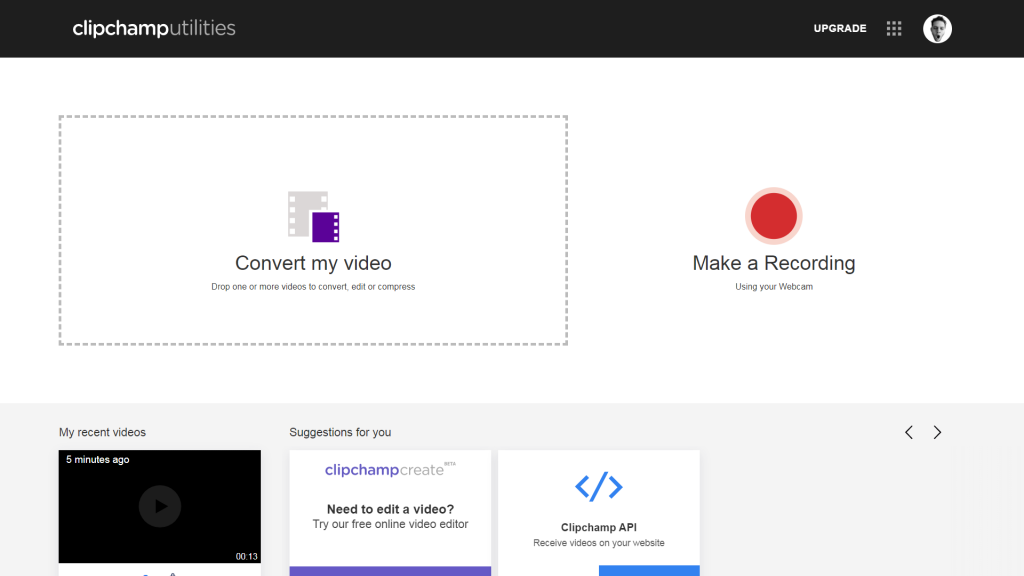
If you choose “Compress a video,” you will be redirected to this site. Here you can drag and drop video or make a recording using your webcam.
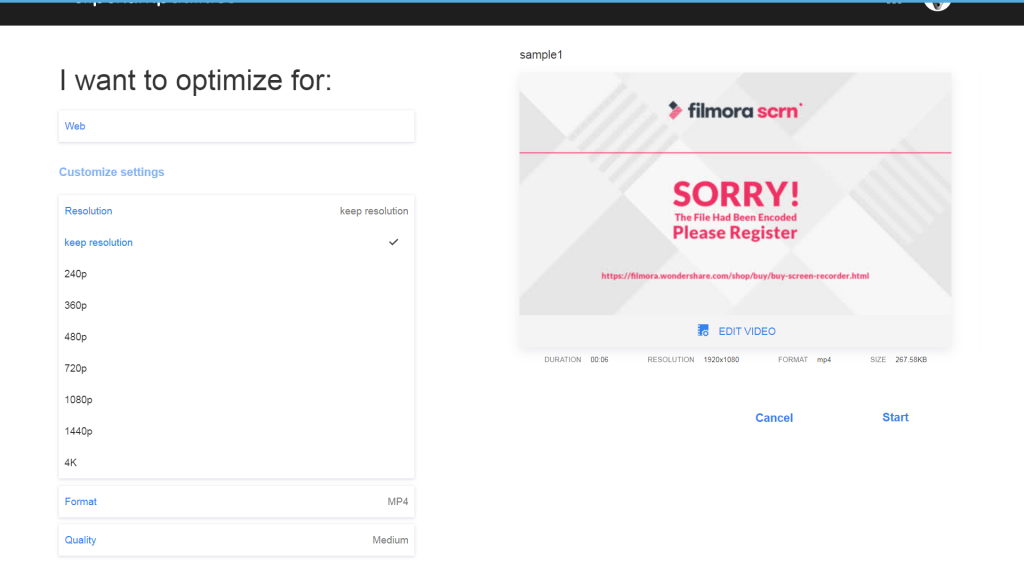
After the upload is finished, the optimizing site appears. Here the Clipchamp excels because you can simply choose your resolution, format, quality, etc., from well-organized columns. If you picked everything, click on start.
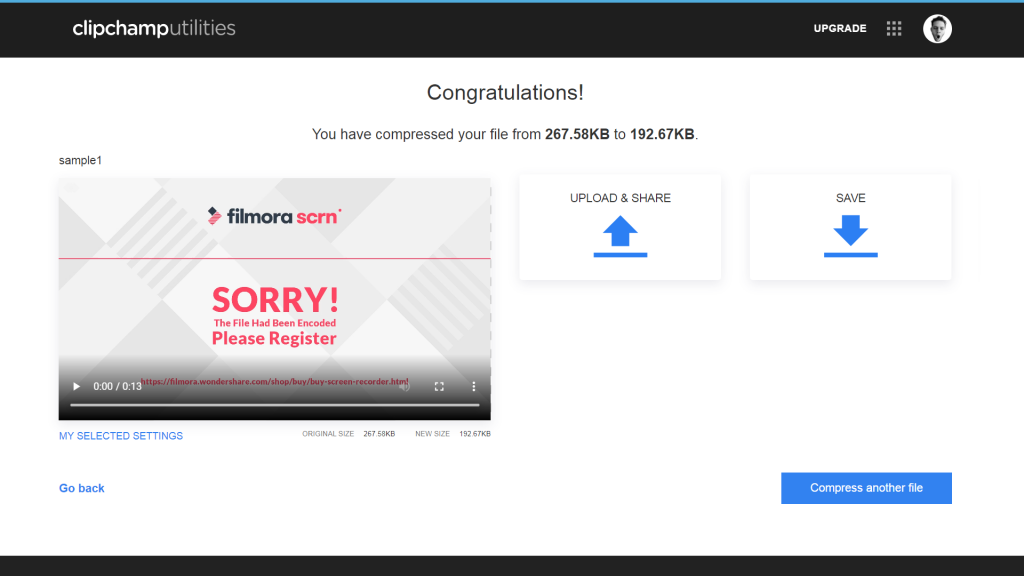
And you are ready to upload, share, save, or compress another file.
Available on: All Devices With Internet Connection
Price: Free (with premium options)
Most a handy online tool if you want to convert your video or audio into different formats quickly. Media.io provides up to 40 formats and free compression. The videos can be changed into seven resolutions, and compressed video can be saved into your local drive, Google Drive, or Dropbox.
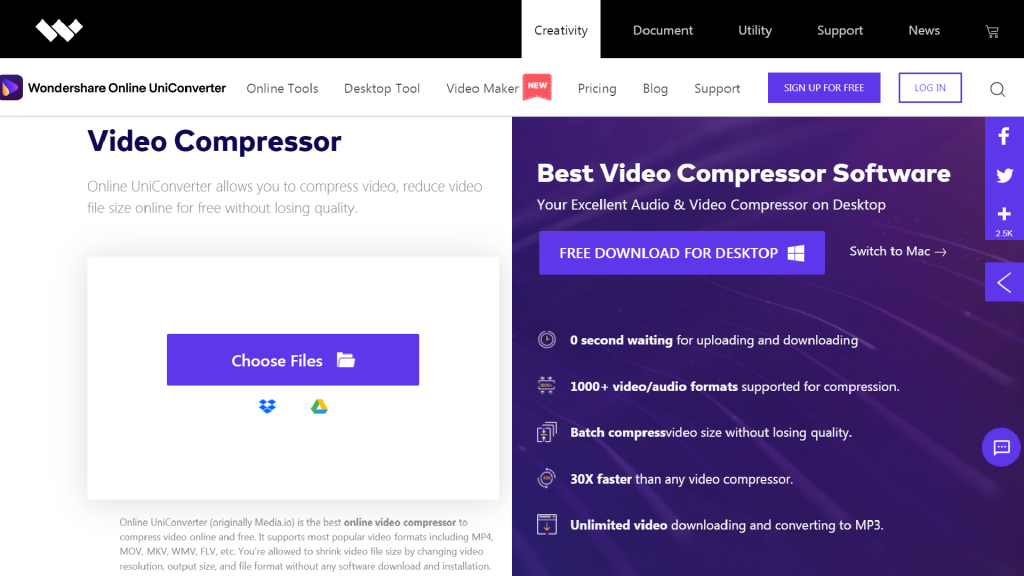
Choose a file from your device drive, Google Drive, or Dropbox. It will be automatically uploaded.
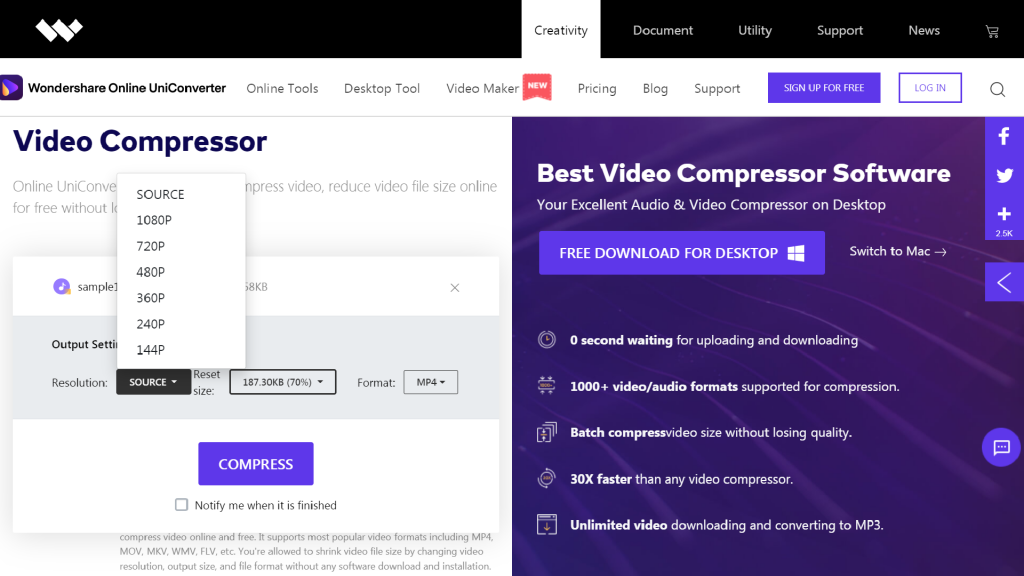
Now choose the resolution, reset size, and format and press compress.
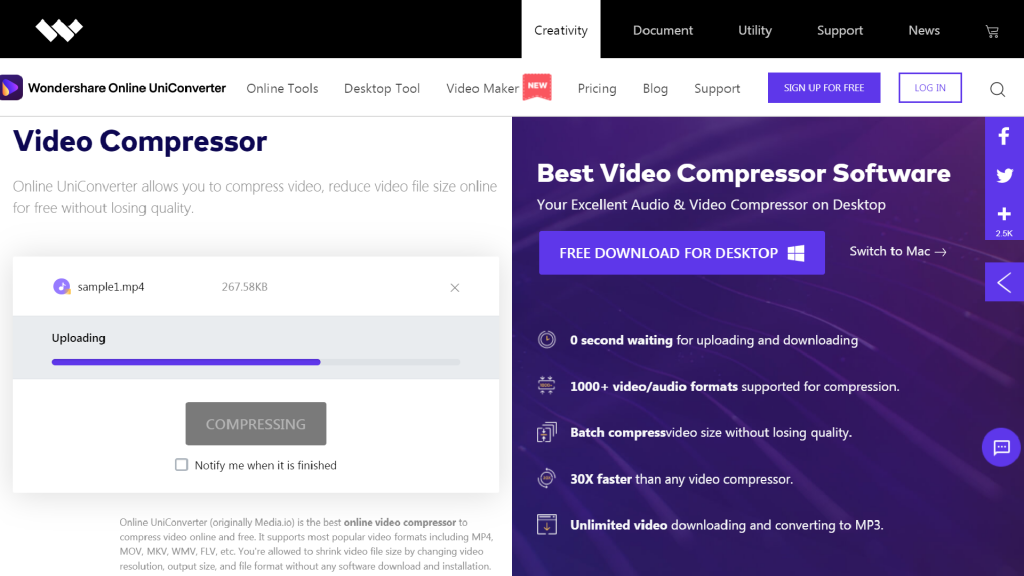
Compression usually takes Media.io a few seconds if your video is short and a few minutes if it’s long. You can also be notified after the reduction is made.
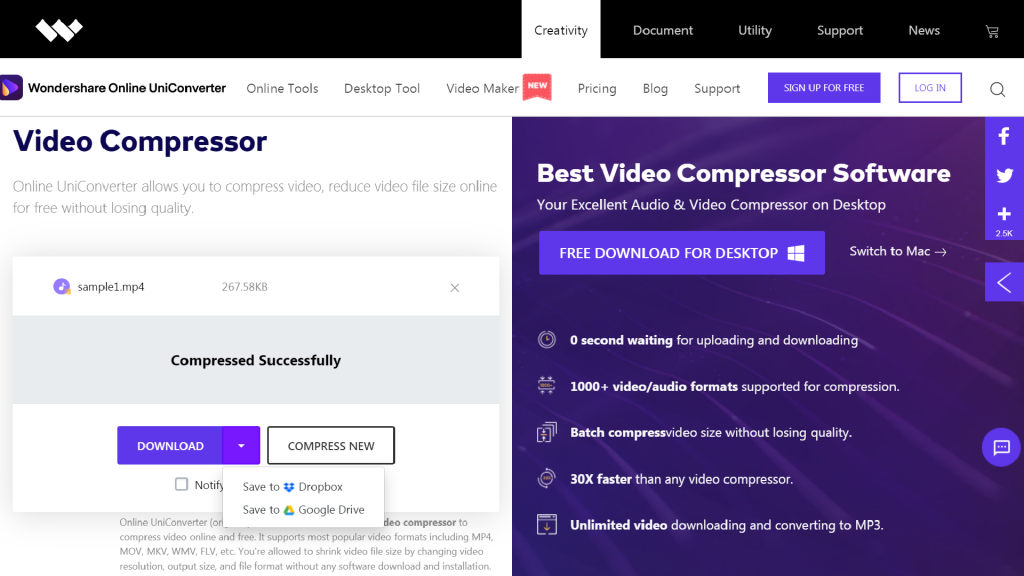
Now you can upload it back to your online drives, download it into your device or compress a new video.
Available on: All Devices With Internet Connection
Price: Free

Image
Video and image compression is similar in many aspects. For the majority of images, you can use lossy compression tools without losing quality. Many reviewed video compression apps mentioned above provide image compression as well.
Here are the best image compression apps:
Desktop
Web-Based
Mobile Apps
Favorite app for painting, animating, and primarily photo editing. Photoshop is a premium desktop tool that will help you with image compression like nothing else. This compression variant is valuable mainly for those who already work with Photoshop. However, suitable alternatives are Affinity Photo and Gimp.
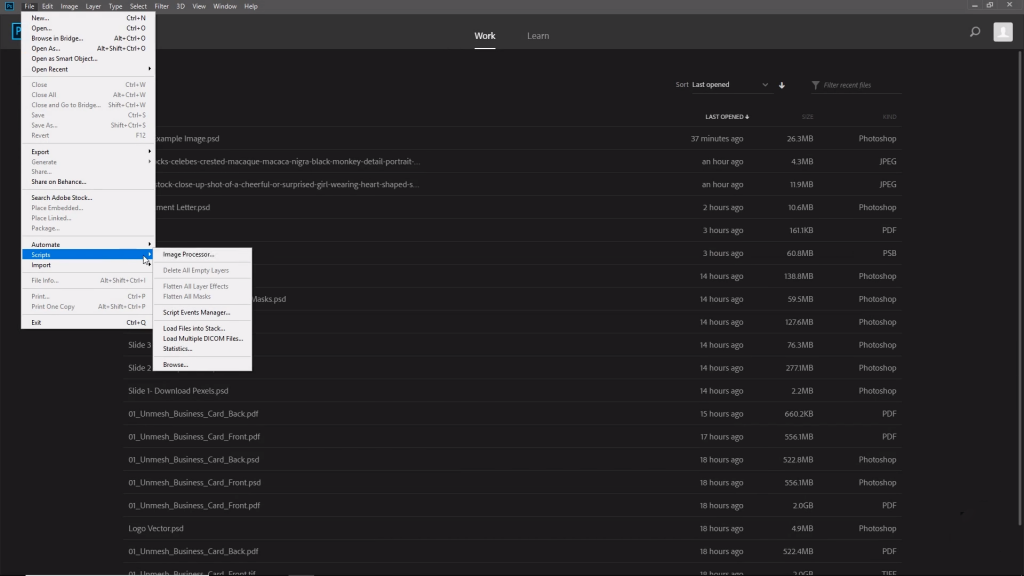
Before you start, make a new folder with images you want to compress. Then open Photoshop, move the mouse on File -> Scripts, and click on Image Processor.
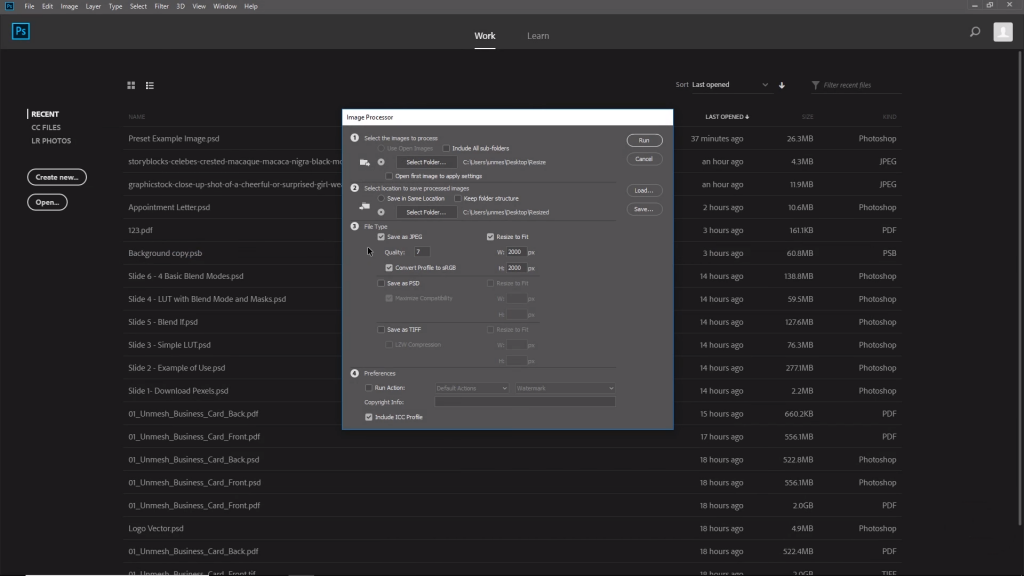
The action will open an eponymous tab. Here you got everything necessary. Unfortunately, this action provides only three formats. Anyway, choose the quality, dimensions and select input + output folders, then press run. Also, do not forget to save your preset.
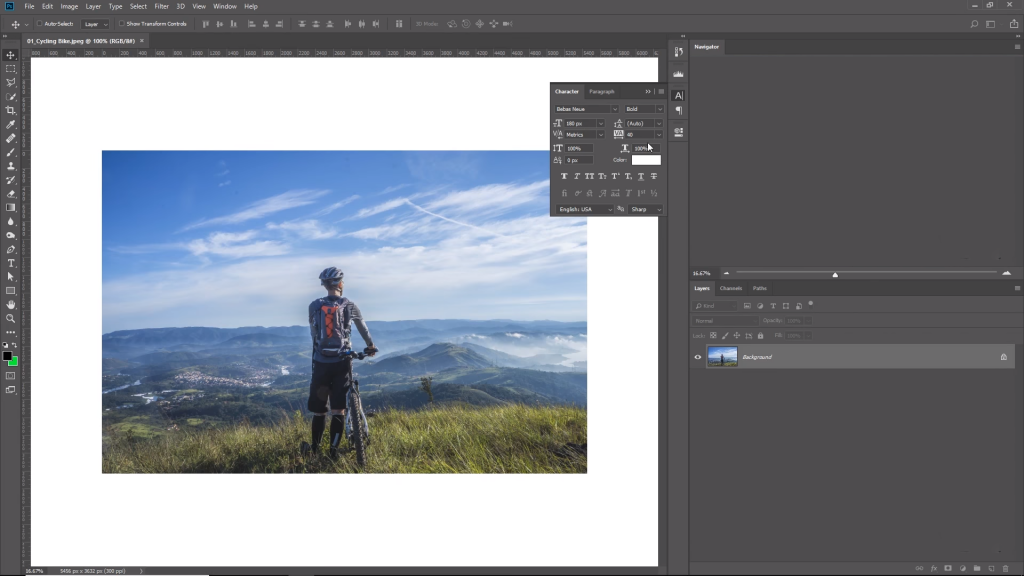
Photoshop will automatically start compressing images and saving them in the chosen destination.
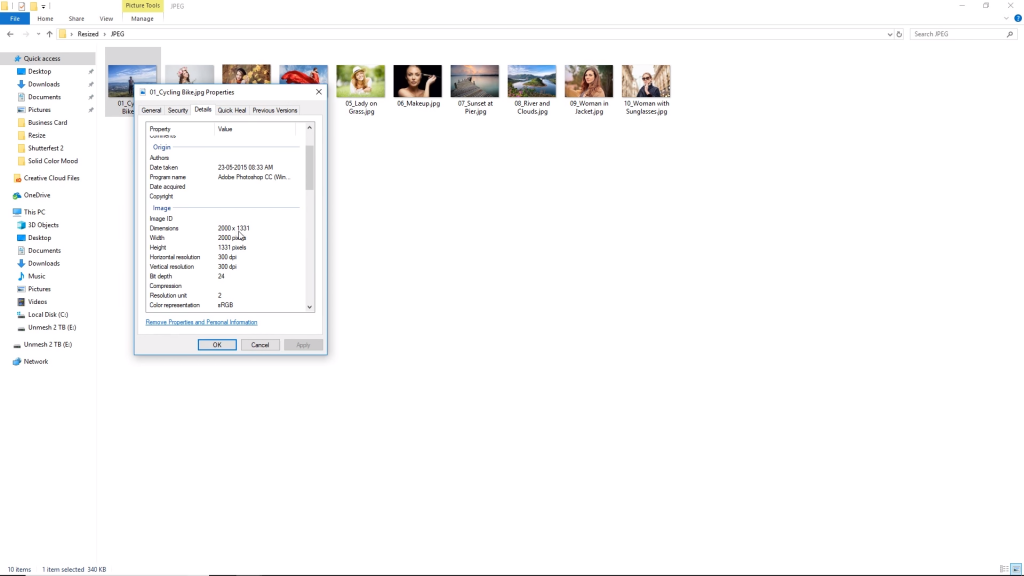
After it is done, check the quality and size of your images. If you want to save into a different format with some additional features, you have to do it manually, or you can make your series of compressing actions in the “Actions” bar.
Available on: Windows, macOS, iPad
Price: Starting at $10/month
Most straightforward and accessible website for image compression available across all devices. The user interface of Optimizilla is understandable even for an amateur, and you can upload and compress up to 20 images at once. Unfortunately, Optimizilla supports only the compression of JPEG and PNG.

Open Optimizilla in your browser and upload an image.
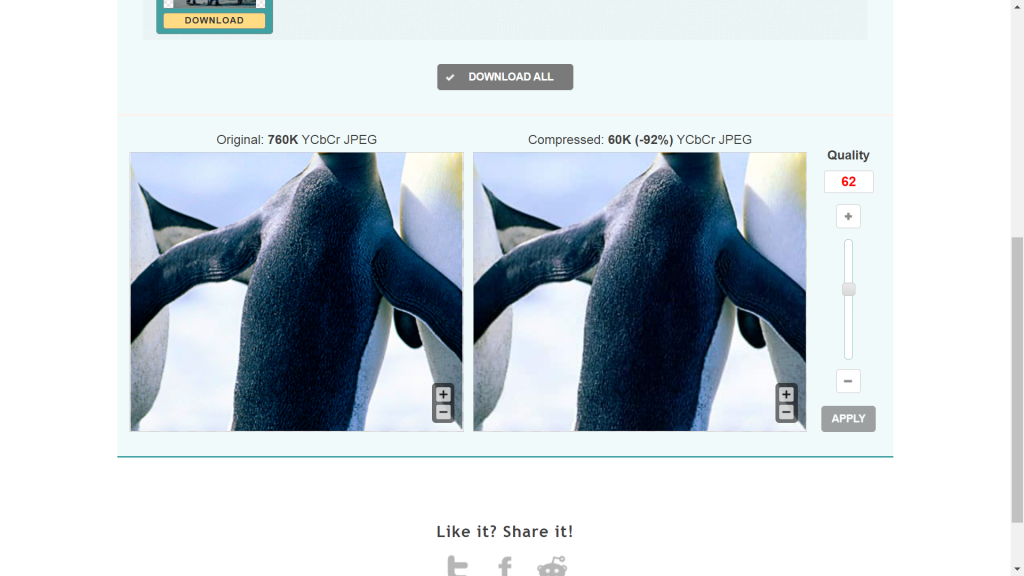
After the image loads, you can start changing the quality of the compressed image with a slider. Slide up for higher resolution and vice versa, rewrite the red number above the slider, and then press “Apply.” It will preview the compressed image’s quality on your right and the original image on the left.
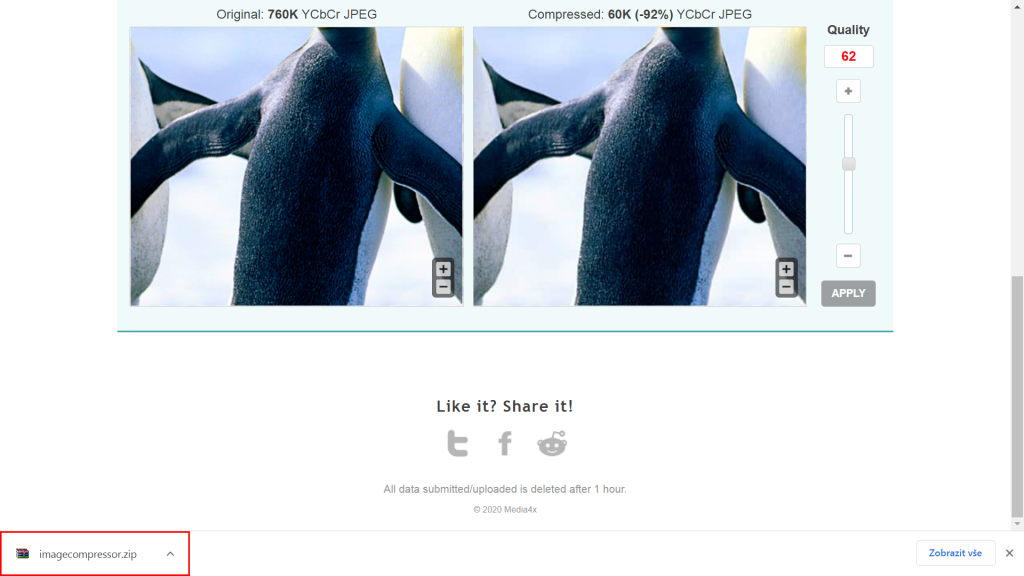
If you are happy with the quality and size reduction, click on “Download All.” Optimizilla will generate a .zip file containing compressed pictures.
Available on: All Devices With Internet Connection
Price: Free
Lit Photo (Photo Compress & Resize)
A handy app for those who want to compress, resize or crop photos on their Android device. Lit Photo allows you to suddenly compress up to 100 images and unlimited amounts of pictures in the premium version.
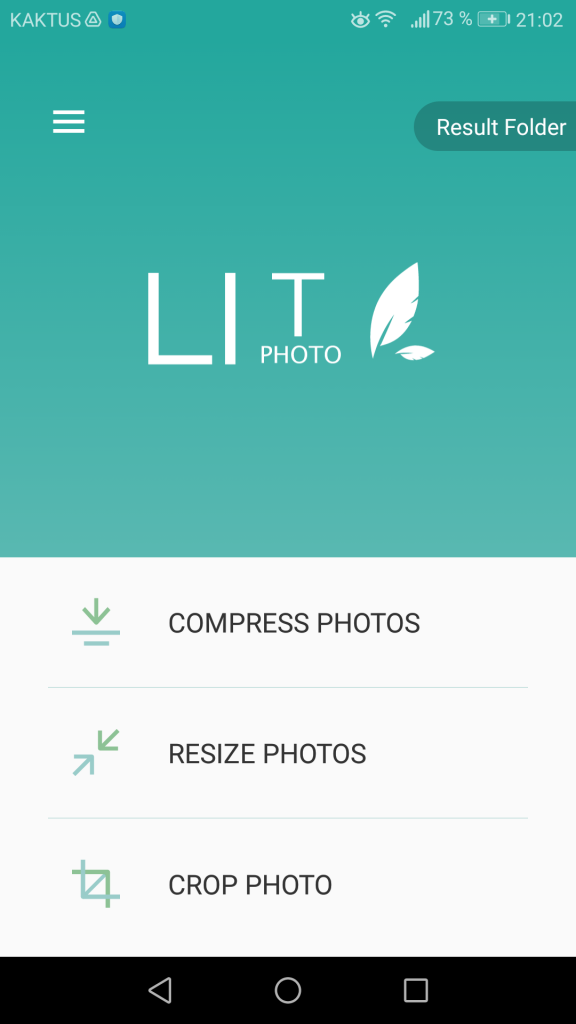
A clean front page will greet you. Tap on the first button, “Compress Photos.”
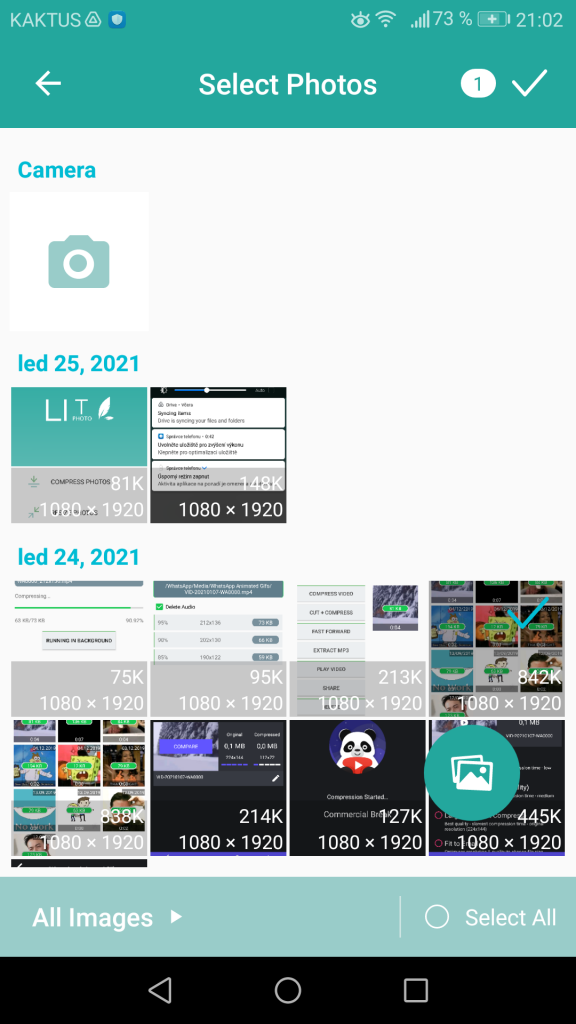
You are going to be redirected to the “Select Photos” tab. Here you can choose one or multiple photos to compress or make new ones. Then click on the check mark in the top-right corner.
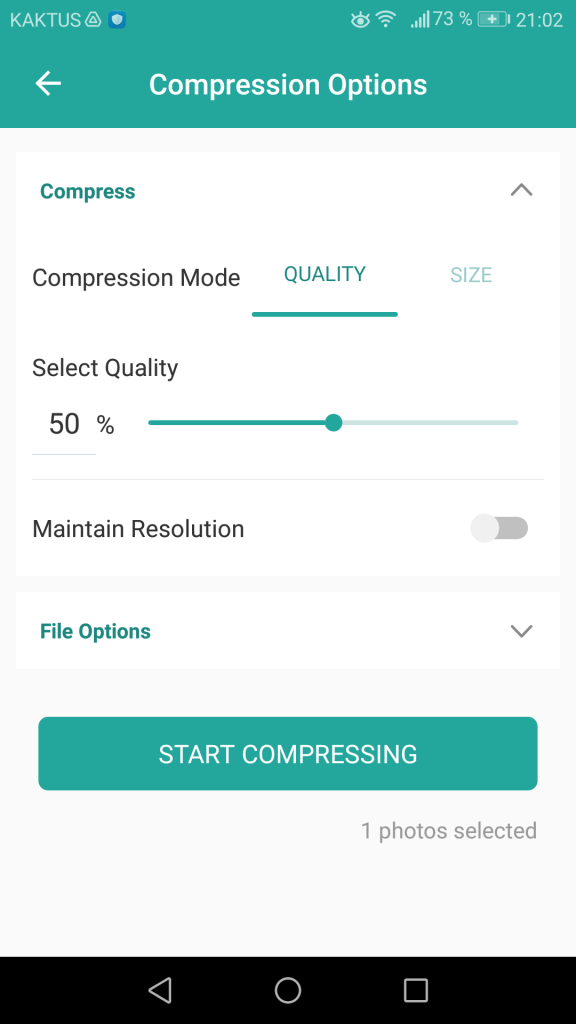
The essential tab pops up. Change the quality, size, and other aspects you want for your compressed data. When you are finished, tap on “Start Compressing.”
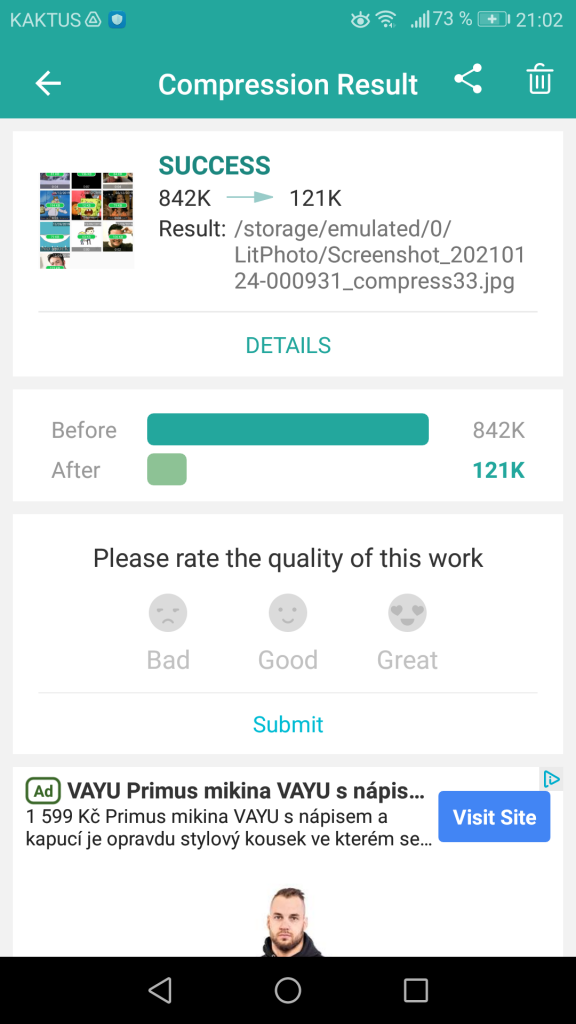
And the process is finished. Now you can share or download your images and check the before & after comparison.
Available on: Android
Price: Free (Premium: $1/lifetime)
New Marketing Lab (Compress Photos & Pictures)
Even simpler app than Lit Photo. New Marketing Lab Compress Photos & Pictures provide you an excellent compression tool for iOS devices with a limit of three pictures at once in the free version.
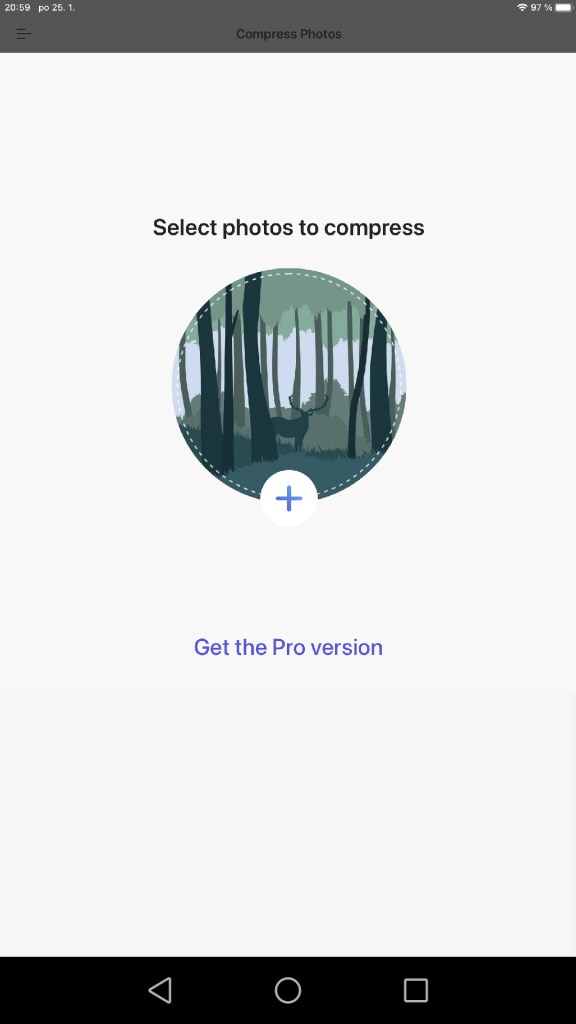
Tap on the plus icon in the middle of your screen.

The photo selecting tab will appear. Here you can choose up to three images and more in the premium version. You also see the size of each image. Pick pictures and press “Next” in the top-right corner.
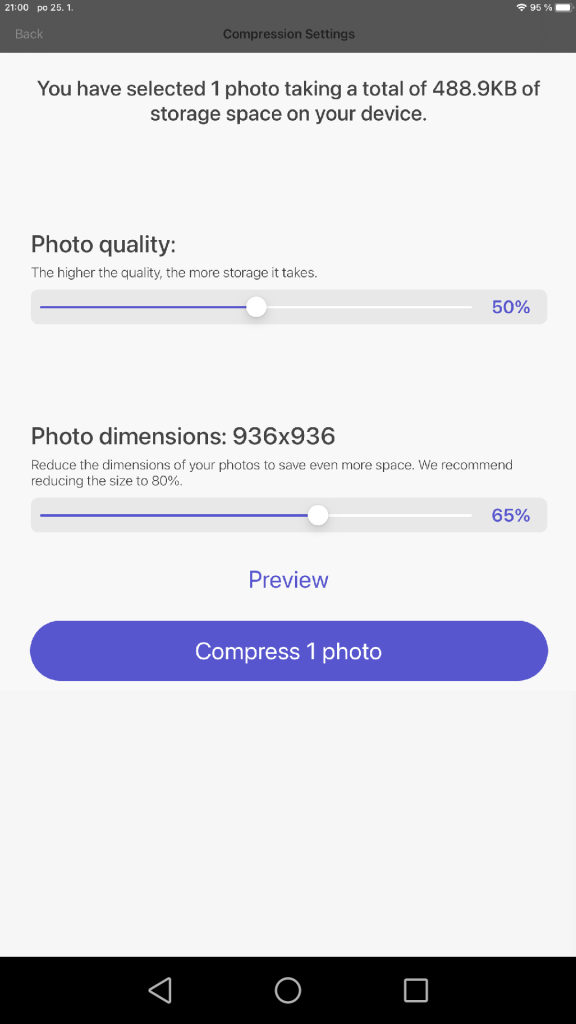
This compression tool allows you to change the dimension and quality of your photos. Change the sliders and click on the preview to see the final results. If you are happy with the previewed outcome, tap on the “Compress” button.
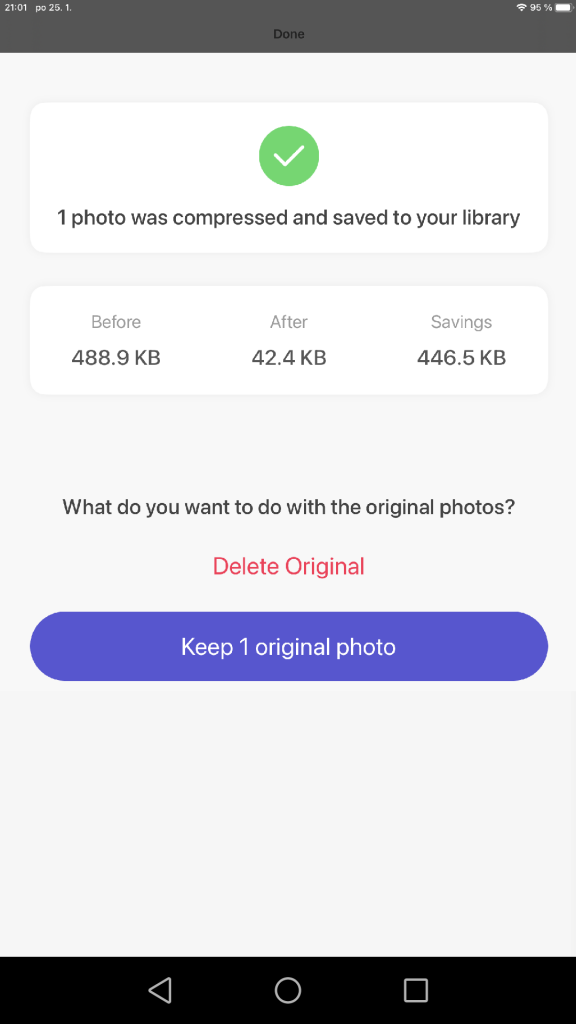
That is it. Compress Photos & Pictures mediates an unusual feature to delete or keep the original photo.
Available on: iOS
Price: Free (Premium: $10/lifetime)
In a nutshell
Nowadays, we got tons and tons of compression apps with many diverse features. From my perspective, if you are a video and image amateur, use mobile apps to compress data on your smart devices and web-based platforms on your laptop and computer. These two categories are easy to understand and follow.
Nonetheless, desktop compression apps will provide you the broadest range of features and options. So, professionals should primarily use them to deliver the best quality videos and images with the smallest size possible.
